Remove noise from a photo
Remove the grain from a photo taken in low light, or the blocks from a JPEG saved at a low quality. The photo keeps its size, and the model runs on your device, so the photo isn't uploaded.
How to remove noise from a photo#
- Paste a photo with Ctrl+V, drop a file on the page or press Load.
- Press the Remove noise button that appears once the photo is open (the Remove noise button on the bar does the same).
- The result replaces the photo at a Strength of 80%. To keep more or less of the original, drag Strength sideways with a mouse, or tap it for a slider.
- Save it as PNG, or as JPEG at a high quality so the save adds no blocks of its own, or copy it.
Strength changes the result until you edit something else, such as drawing an arrow or cropping. One undo (Ctrl+Z) brings back the photo as it was, whatever Strength did. On the other pages, pick the Enhance tool, between Cutout and Read near the end of the tools (on a phone, swipe the toolbar to it), and press the Remove noise button on its bar, with 1× picked.
Strength#
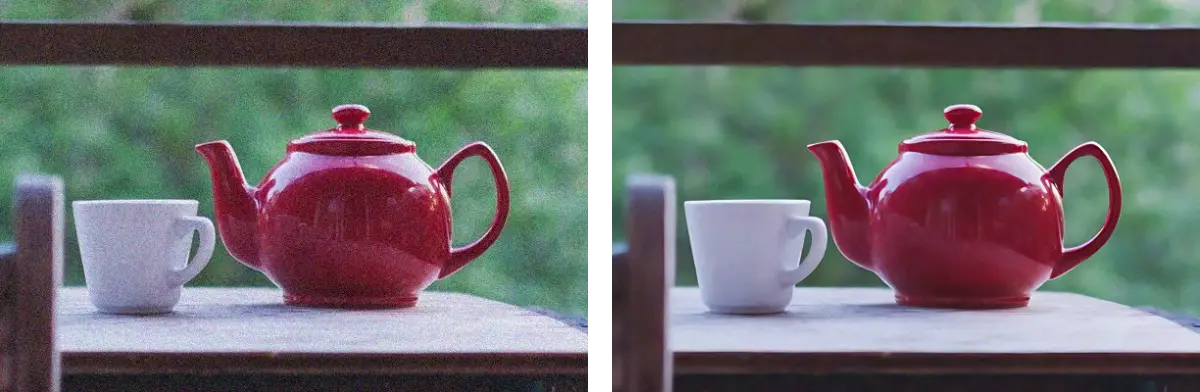
At 100% you get the model's result alone, the smoothest, where skin can look waxy and fine texture painted. Lower, the original's brightness comes back, its grain with it, while the colour stays the model's, so the coloured speckles don't return. It starts at 80%, where a little grain is left and skin still looks like skin.
Grain from low light#
In dim light a phone or camera turns up its sensitivity, and the photo comes out grainy, with speckles of colour in the darker parts. Remove noise clears both and keeps edges sharp, where a blur softens the edges with the grain. Heavy noise can come back smooth and a little painted.
JPEG artifacts#
A JPEG saved at a low quality shows 8 × 8 blocks and halos along edges. At 100% Remove noise smooths the blocks away, and at 50% they're fainter and the picture stays closer to the photo. It can't bring back detail the JPEG threw away. So that saving adds no new blocks, save it as PNG.
Traces next to boxes, blurs and pixelations#
Remove noise reads the photo under the boxes, blurs and pixelations you drew on it, so the pixels next to them can carry faint traces of what they hide. Each pixel it makes depends on the photo up to about 34 pixels around it, covered or not, whether you cover before removing noise or after. The traces are faint, a few levels of brightness, but they're in the saved file. To keep a covered part out of the result, save the photo with its covers, open the saved file and remove the noise there, or make each cover reach about 34 pixels past what it hides.
What it can't fix#
A blurred or out-of-focus photo stays blurred. Remove noise doesn't sharpen. On a screenshot it turns pale grey backgrounds white and grey text darker, more so at 100% than at 50%, so it suits photos more than screenshots.
Download size and speed#
A noise removal model (Real-ESRGAN) runs in your browser. With no model files stored, it needs 11.1 MB (6.6 MB of that is the runtime, which background removal and face detection use too). 2× and 4× on the bar upscale an image with the same model, so once either page has downloaded it, the other needs nothing more. The page asks before downloading missing files, and it works offline once they're stored. Where the browser can use the graphics card (WebGPU), it takes seconds. Elsewhere it runs on the processor, where a photo of one megapixel takes a minute or more, so there it takes photos up to 1 megapixel, or 0.5 on a phone, a tablet or a device with little memory, and the bar says so for a larger one. A run that would take more than 3 minutes stops and says how long it would have taken.